
Chimney Flashing Leak Causes and How to Repair Them Properly
Water does not need a wide opening to create an expensive mess. One small gap beside a brick chimney can stain drywall, rot sheathing, soak insulation, and make a homeowner blame the roof when the real failure sits at the joint. A chimney flashing leak often starts quietly because the metal, masonry, shingles, sealant, and roof slope all meet in one demanding spot. In many U.S. homes, that joint faces hard freeze-thaw cycles, summer heat, wind-driven rain, and poor repair work from past owners. The smartest move is to understand the warning signs before a small stain turns into a ceiling cutout. Homeowners comparing repair options, contractor quotes, or local service guidance can also learn from trusted home improvement resources like property maintenance insights while weighing what belongs in a DIY repair and what needs a licensed roofer. Flashing problems punish guesswork. The right fix depends on where water enters, how the flashing was built, and whether the chimney itself has started pushing water into the roofline.
Why a Chimney Flashing Leak Starts Before You See Water
Roof leaks around chimneys feel sudden because the ceiling stain appears all at once. The failure, though, often spends months forming under shingles or behind brick. Metal expands, mortar shrinks, caulk dries, and water keeps testing the same weak line until it finds a path inside.
How flashing around chimney joints fails under weather pressure
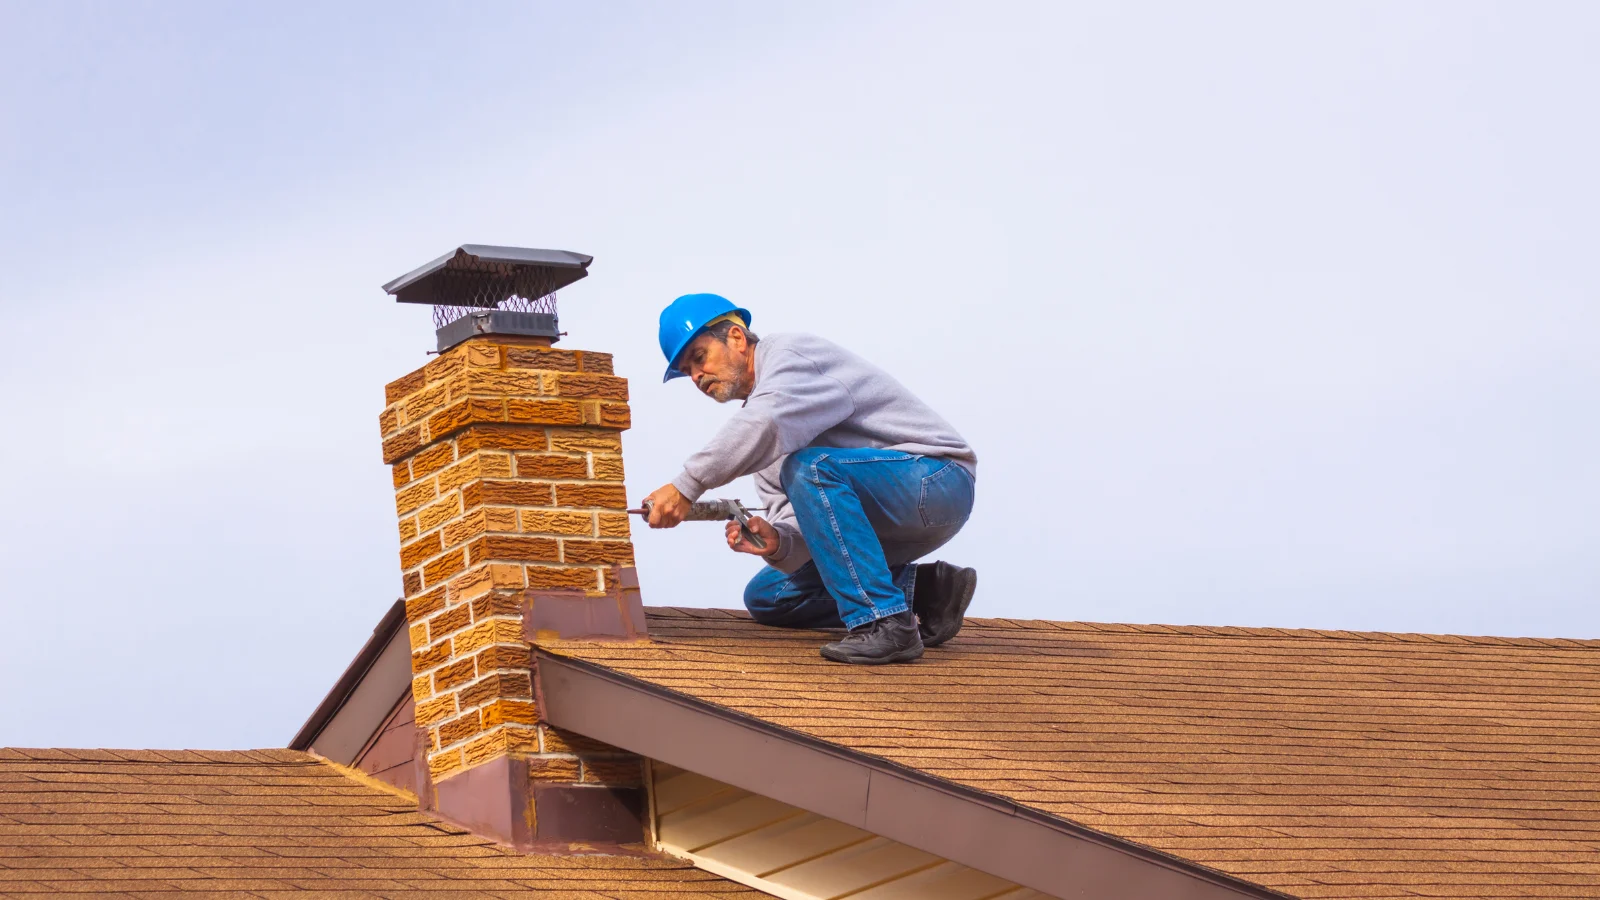
Flashing around chimney edges has a hard job because it must bridge two materials that move differently. The roof deck flexes with heat, wind, and seasonal moisture. The chimney stays heavier and more rigid, but its mortar joints still absorb and release water. That movement slowly opens gaps where step flashing, counterflashing, and shingles should overlap.
A common U.S. example shows up after a harsh Midwest winter. Snow melts during the day, refreezes at night, and pushes water under edges that looked tight in October. By spring, the homeowner sees a brown mark near the fireplace wall and assumes the roof shingles failed. The shingles may be fine. The weak point may be a bent corner where flashing around chimney masonry no longer sheds water cleanly.
The counterintuitive part is that brand-new shingles can make the problem easier to miss. A roof can look fresh from the street while old chimney metal stays buried at the base. If a roofer reuses rusted or poorly cut flashing during a reroof, the house gets a cosmetic upgrade without solving the water path.
Why roof flashing repair cannot rely on caulk alone
Caulk can help seal a small joint, but it cannot rebuild a broken water-shedding system. Roof flashing repair works when metal pieces overlap in the right order, not when someone smears sealant across every visible crack. Water always wins against thick beads of roof cement left in full sun.
Many homeowners inherit this exact mistake. A previous owner sees water near the chimney, climbs up with a tube of sealant, and covers the joint. The leak slows for one storm, then returns after the sealant hardens and splits. Worse, the patch may trap water behind the metal and hide rust until the next repair costs more.
A proper fix starts with inspection, not a tube. The roofer checks whether step flashing sits under each shingle course, whether counterflashing is cut into mortar joints, and whether the upslope side needs a cricket to split water flow. Sealant supports the system. It should never become the system.
The Hidden Causes Behind Chimney Water Entry
Once you know the flashing joint is vulnerable, the next step is separating surface symptoms from root causes. Chimney leaks can come from bad metal work, cracked masonry, missing caps, or poor roof drainage. The stain inside rarely tells the whole truth by itself.
When chimney leak repair starts with the masonry
Chimney leak repair often starts above the roofline because brick and mortar can absorb rain before flashing gets blamed. Old mortar joints crack, crowns split, and porous brick takes in water during long storms. That water can travel down the chimney body and appear near the ceiling, making the roof edge look guilty.
This is common in older Northeast homes with unlined or aging chimneys. The brick may have survived decades, but freeze-thaw cycles slowly widen hairline cracks. A homeowner may pay for roof patching twice before anyone checks the crown, cap, or mortar joints. That is money spent on the wrong battlefield.
A skilled contractor tests the chimney as a whole. They look for missing mortar, open crown cracks, rust stains, loose counterflashing, and gaps where metal should be set into reglets. The best clue is pattern. Water during wind-driven rain may point to side flashing, while dampness after long soaking rain may point higher on the chimney.
How poor slope and roof valleys feed water damage near chimney areas
Water damage near chimney walls often gets worse when roof geometry sends too much runoff toward the masonry. A chimney located low on a steep roof, close to a valley, or beneath a broad roof plane can receive far more water than the flashing was designed to handle. The metal may not be defective at first. It may be overwhelmed.
A chimney cricket solves this on wider chimneys by forming a small peaked diverter on the upslope side. Without it, rainwater and leaves can collect behind the chimney. That standing water works under shingles, stains decking, and creates a damp pocket where rot gains time.
The surprise is that leaks can start after nearby changes. A new gutter, a removed tree, or a roof replacement with a different shingle profile can change how water moves. You may not connect that change to the stain near the fireplace, but the roof remembers every redirected gallon.
Why a Chimney Flashing Leak Needs the Right Repair Method
Repair choice matters because chimney flashing is layered. A tiny open seam may need sealant and mortar work. Failed step flashing may need shingle removal. Rotted decking may require a larger rebuild. The goal is not to stop today’s drip. The goal is to restore the path that keeps future storms outside.
What a professional roof flashing repair should include
A solid roof flashing repair begins with exposing enough material to see the failure. The contractor may lift shingles, inspect step flashing, check counterflashing depth, and look for soft decking near the chimney base. Any quote that skips this step and promises a mystery patch deserves caution.
The repair should replace damaged metal with corrosion-resistant flashing suited to the roof and chimney. Galvanized steel, aluminum, copper, and lead-coated materials each behave differently, and local codes or roof materials may narrow the choice. In coastal U.S. areas, salt air can shorten the life of cheaper metals faster than homeowners expect.
Good work also respects overlap. Step flashing should pair with each shingle course along the sides. Counterflashing should cover the top edges and shed water over the step flashing. On the upslope side, a saddle or cricket may be needed if the chimney width and water flow demand it. The metal should guide water away without asking sealant to do the heavy lifting.
Where DIY chimney leak repair becomes risky
DIY chimney leak repair makes sense only when the issue is small, visible, and safe to reach. Replacing a cracked bead of sealant at a minor counterflashing edge may be manageable for a careful homeowner on a low-slope roof. Even then, roof safety matters more than saving a service call.
Trouble starts when the repair requires removing shingles, cutting mortar joints, bending metal, or diagnosing hidden rot. One bad cut in counterflashing can send water behind the system instead of over it. One missed shingle lap can create a new leak while the old one appears fixed.
Insurance can add another wrinkle. If a homeowner performs a poor repair and later files a water damage claim, the insurer may look closely at maintenance history. That does not mean every DIY repair creates trouble, but it does mean sloppy patchwork can become expensive in more than one way.
How to Prevent Future Leaks After the Repair
The best chimney repair does not end when the stain dries. Prevention means watching the roofline before storms find old weaknesses again. It also means treating the chimney as part of the roof system, not as a separate brick tower that happens to pass through it.
Seasonal inspection of flashing around chimney edges
Flashing around chimney bases should be checked at least once a year, and spring is a smart time in much of the U.S. Winter exposes weak joints, while spring rain reveals whether the system still sheds water. You do not need to climb on the roof to spot every clue. Binoculars from the ground can show lifted metal, loose mortar, rust trails, or debris piled behind the chimney.
Inside the home, watch the attic before the ceiling tells on you. A small damp mark on sheathing, darkened insulation, or a musty smell near the chimney chase gives you an earlier warning. That early warning can save drywall, paint, and framing.
A simple photo log helps more than most homeowners expect. Take clear pictures after repair, then compare them after storms and seasonal changes. Metal movement, mortar cracks, and leaf buildup become easier to spot when you have a baseline.
Stopping water damage near chimney areas before it spreads
Water damage near chimney framing grows quietly because insulation and drywall hide moisture. Once you notice a stain, check the attic, fireplace surround, and nearby walls. The leak may have traveled along rafters before dropping into the room, so the visible stain may sit several feet from the entry point.
Act fast, but do not rush the diagnosis. Dry the area, mark the stain, and note which storm conditions caused it. Heavy rain without wind tells a different story than sideways rain from one direction. That detail helps a roofer test the right side instead of guessing.
Prevention also means keeping gutters clear, trimming branches that drop debris, and checking the chimney crown after freeze-heavy winters. A watertight flashing system can still suffer if water pools above it or if masonry keeps feeding moisture into the roofline. The boring maintenance steps are the ones that keep the repair boring for years.
Conclusion
A roof does not fail only in the wide open field of shingles. It often fails at the seams, corners, and transitions where different materials have to cooperate under pressure. The chimney is one of those places, and it deserves sharper attention than most homeowners give it. Treating a chimney flashing leak as a simple caulk problem is the fastest way to buy the same repair twice. The better approach is slower at first: trace the water, inspect the metal, judge the masonry, and repair the system in the order water actually moves. That mindset protects your ceiling, your roof deck, and your wallet. If you see staining, peeling paint, damp attic sheathing, or cracked mortar near the chimney, call a qualified local roofer or chimney specialist before the next heavy storm. A small, well-timed inspection can beat a large repair bill every single time.
Frequently Asked Questions
What is the most common cause of a chimney flashing leak?
Failed overlap between step flashing, counterflashing, and shingles causes many leaks. Cracked mortar, rusted metal, poor sealant work, and missing chimney crickets can also create water entry. The cause depends on roof slope, chimney condition, and how the original flashing was installed.
Can I seal chimney flashing with roofing caulk?
Caulk can seal a small exposed gap for a limited repair, but it should not replace missing or failed metal flashing. A lasting repair usually needs correct metal overlap, sound mortar joints, and clean drainage. Thick sealant patches often crack and hide deeper damage.
How do I know if my chimney flashing is leaking?
Look for ceiling stains near the fireplace, damp attic sheathing, peeling paint, musty smells, rust marks, or wet brick after storms. Water may travel before it appears indoors, so the visible stain may not sit directly below the leak.
How much does chimney flashing repair cost in the United States?
Minor sealing may cost a few hundred dollars, while full flashing replacement can cost much more depending on roof height, material, slope, damage, and local labor rates. Repairs involving rotted decking, masonry work, or a chimney cricket usually raise the final price.
Should chimney flashing be replaced when replacing a roof?
Replacement is often the smarter choice, especially if the metal is old, rusted, bent, or poorly installed. Reusing bad flashing under new shingles can create a fresh leak on an otherwise new roof. Ask the roofer to inspect and document the condition.
What is a chimney cricket and when is it needed?
A chimney cricket is a small peaked structure built on the upslope side of a chimney to divert water. Wider chimneys, steep roofs, and areas with heavy rainfall often benefit from one. It helps prevent water and debris from collecting behind the chimney.
Can cracked chimney mortar cause leaks that look like flashing problems?
Cracked mortar can absorb and channel water into the roofline, making the flashing look guilty. A good inspection checks the crown, cap, brick, mortar joints, and flashing together. Fixing only the metal may fail if the masonry continues taking in water.
How often should chimney flashing be inspected?
A yearly inspection is smart, especially after winter or severe storms. Homeowners in snowy, windy, or high-rainfall regions should check more often. Early signs like loose metal, rust streaks, cracked sealant, or damp attic wood are easier to fix before major damage spreads.